Article Detail
27 Jun
- 0 Comment(s)
- /
Here at The Rocking Chair, we are often approached by people who would like their dining tables touched up or even painted to make them look modern, but on this occasion we were asked if we could restore a large oak table that had been stored in a shipping container for 10 years....I was not sure what state the table would be in but arranged to meet Mr Jones at his home in Carmarthenshire to asses the table and to give Mr Jones a price to do the restoration ...if it was at all possible.
When I arrived at Mr Jones house I was surprised to see the table in their large open plan dining/living room and it didn't look to bad...but on closer inspection it was not a happy table!
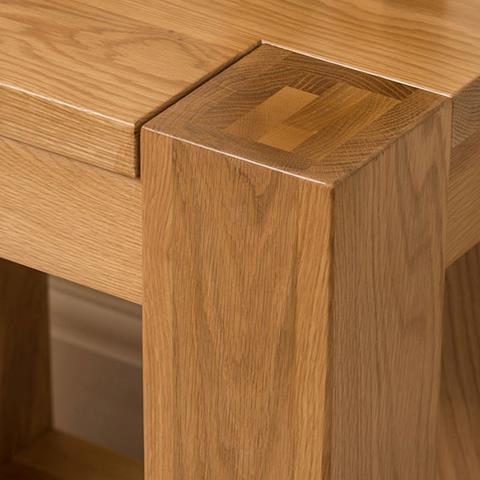
The top of the table was not screwed down to the frame and I found out it had been stored that way which over the years had allowed the table top to become 'wavey' in appearance, 2 large splits were evident in the table top and the legs had large cracks in the block work making up the ornate carved legs. While discussing the table with Mr Jones it became clear that although he had heating in the shipping container, he could not be sure how long it had been on for, as he was aware that there were long periods times over the winter months where the heating was not turned on.


It was evident from the inspection that the blocks in the legs could not be glued and clamped and would need to be filled, this is easy to do with the modern hard set coloured wax fillers but does not allow for further movement of the block as the table dries out now that it is in a heated room, as for the splits in the table top, we would have to cut the table top into sections to remove the splits re glue and refinish as required. A larger job on a very large table ...it measures 10' long by 5' wide and sat 12 people and Mr Jones had payed several thousands of pounds for this table and chair set but for years had not had a room big enough to put it in so hence the storage.
I explained that the job could be done ...but it would be best to leave the table stand in the heat of the room for a month or so to try and dry out the table before we did any repairs/restoration to the table, this he agreed to and so before I left I secured the table top to the frame of the table to try to prevent more movement of the table top before we carried out the work.
Approximately one month later......we returned with our van and tools to bring the table to our Swansea workshop to carry out the work, upon inspection of the table it appeared that it had not become worse with drying out but Mr & Mrs Jones did say the table had been creaking and cracking while they watched TV and were happy that I had suggested we leave it a month to dry out.

The first thing we did was to strip the table down so the legs and the split top could be worked on separately, as explained earlier the ornate legs had become split as the block work expanded and moved in the damp conditions of the storage container, so my college (with over 12 years experience) would fill sand and prepare the legs for re finishing and I would cut out the splits in the table top and re join the table.
Repairing the legs

Here you can see that the splits in the legs are being filled with a "hard wax", hard was is a coloured wax stick that is melted with a blow torch and fills gaps and splits and is allowed to set hard before it can then be shaped carved and sanded to fill and split. The expertise in this job is to know what colour will match when the table is re finished and the ability to carve the new filled areas so they blend in with the rest of the carvings.
Above is a box of various colours of "Hard Wax" that we use to fill splits and cracks that are stable and large as it sets hard allowing it to be carved to and profile. A normal gas small blowtorch is used to melt the wax.

Here in this picture you can see hoe the legs have been filled but not yet refinished to blend in, the legs have been sanded by hand, care being taken to get into all the intricate parts of the carvings to ensure that when the legs are finished that all residues that will affect addition of the new lacquer are removed, after this the legs are washed in a cellulose thinners to remove any silicon. Silicon is present in modern spray on polishes and can severely hamper a re finish by causing the new lacquer to blister and bubble ruining the finish, so again great care is taken.
Removing Splits From The Table Top
The table top had been stored in the shipping container not fixed to its legs and so had been expanding and contraction over the years which had resulted in two very large splits and warping of the table to around the splits, so it was decided to cut the table in to 3 pieces along its length to try and do two things, the first was to remove the splits and the second was to alleviate or even remove the warping of the table top by clamping when the table was resembled
 .
.
The picture above shows the marking out along the table length to cut out the splits, two full length cuts were made removing both splits, allowing re joining with a Biscuit joiner to increase the glue surface area and to prevent slipping of the joined surfaces past each other making a step when clamping.

Above is a picture of a different table being fixed but it shows how a Biscuit Joint works very well.
After gluing and inserting of the biscuits the table parts, now in three, were joined and clamped, the clamping is done alternately, with a under and over consecutive pattern to force the table to straighten, this does not always work and especially with such a thick table top, this one being 40 mm of solid oak, but we were hopeful of improving its warped surface.

Here you can see the under and over positioning of the clamps that straightens the table top and you can see where the polyurethane glue is expanding out of the joins ensuring a full and tight join between the table parts. once I was happy that table top was a straight as I could get it the table was allowed to dry for 24 hrs before the clamps were remover.
Once the clamps were remover the whole table top was sanded starting with a 120 grit and paper ending in a 320 grit sandpaper, ensuring that the new joints in the table top were sanded as flat as possible, even though we didn't manage to get the warp out of the table top completely it was so much better that unless you were looking for the warp it was hard to find. One thing we did rectify, it was noticed that only the table top had a lacquer finish, this is always a recipe for disaster as the table breaths faster through a unfinished surface than a finished one and this fact alone could have resulted in the table top splitting, top tip ...always check when purchasing anything.....
Re Lacquering of the Whole Table.

Now that the table is repaired and clean ready for lacquering, the first thing to do is to mix a stain match the dark red mahogany that the table was originally finished in, the table top was then stained using a spray gun and the excess wiped of, this method giving a more even coat of stain, the legs being stained with a cloth , with special attention being given to lighter filled and sanded areas to "blend" the colour.


The lacquer finish consists of a 2 coats of clear base coat with hand sanding in between and 2 coats of 10% sheen top coat again with sanding in between, once dry the finish was checked for blemishes and errors and corrected as needed finishing with a total top coat over all the table after it had been reassembled, this was done at the end of the day as the table was so large it could not be moved after it was assembled and wet with lacquer, drying time was over night to make sure the lacquer had hardened enough to handle being moved.
The Table was then returned to Mr Jones where it was reunited with the 10 No ornate chairs it was purchased with...a stunning table brought back to life after 10 years in a damp storage container.
If you have a piece of furniture that needs restoration and you are in the South Wales area we are here to help, or if you just want to comment on the above blog please do.
Hope you enjoy reading as much as I enjoy writing these blogs,
Thank you for reading
Paul
The Rocking Chair Ltd


